Growing a Children's Garden: Exploring Natural Dyes from Plants

Engaging children in gardening activities can be a wonderful way to foster their curiosity, creativity, and appreciation for nature. One exciting project to undertake with kids is growing a garden of plants that can be used to make natural dyes. Natural dyes offer a safe and eco-friendly alternative to synthetic dyes, while also providing a unique opportunity to explore the vibrant colors hidden within plants. In this blog post, we will explore how to create a children's garden that focuses on plants that can be used to make natural dyes. From the extraction process to the wide range of colors available, children can engage in a creative and educational project while learning about the traditional art of natural dyeing.
 Marigold (Tagetes): Marigold flowers can be used to create vibrant yellow and orange dyes. Kids can experiment with different marigold varieties to achieve various shades.
 Nasturtium (Tropaeolum): Nasturtium flowers and leaves can be used to create yellow, orange, and red dyes. Kids can explore the different colors obtained from different parts of the plant.
 Radish (Raphanus sativus): Radish roots can be used to create a range of natural dye colors, including various shades of pink and red.
 Calendula (Calendula officinalis): Calendula flowers can be used to create yellow and orange dyes. Kids can experiment with different concentrations to achieve different hues.
 Dill (Anethum graveolens): Dill leaves and seeds can be used to create a light yellow or greenish dye.
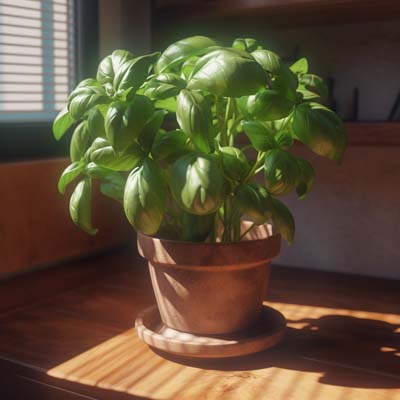 Basil (Ocimum basilicum): Basil leaves can be used to create a soft yellow or greenish dye. It's worth noting that the color may not be as strong as with other plants.
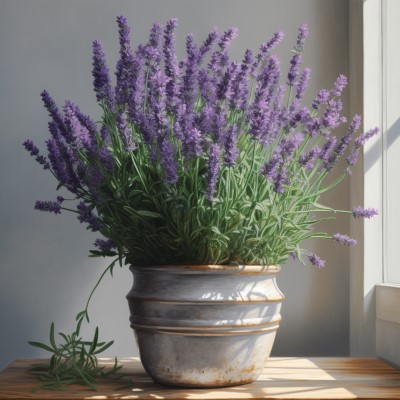 Lavender (Lavandula): Lavender flowers can be used to create a soft purple or grayish dye. Kids can explore different varieties of lavender for variations in color.
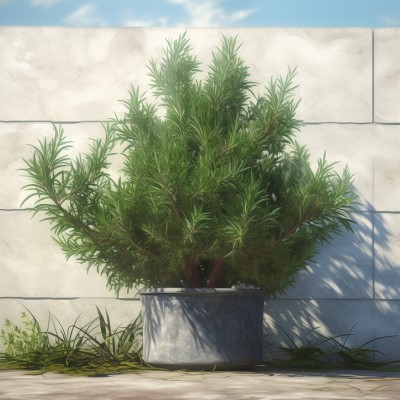 Rosemary (Rosmarinus officinalis): Rosemary leaves can be used to create a greenish-yellow dye. It's best to use fresh leaves for stronger color results.
 Coreopsis (Coreopsis tinctoria): Coreopsis is a beautiful flowering plant that is native to North America. It produces vibrant yellow and orange flowers that can be used to create natural dyes. The petals of the flowers can be collected and boiled to extract the color. Coreopsis is easy to grow and adds a pop of color to your garden while providing dyeing materials.
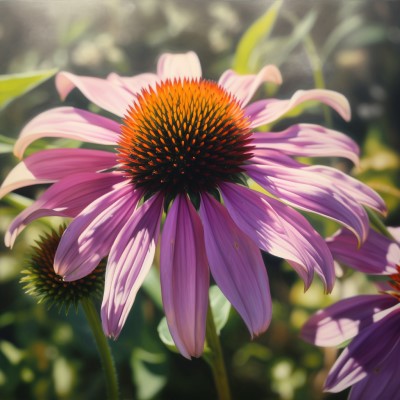 Purple Coneflower (Echinacea purpurea): Purple Coneflower is a popular garden flower known for its medicinal properties. However, it also produces a range of colors that can be used for natural dyeing. The petals of the flowers can be used to create shades of pink, purple, and even greenish tones. Growing Purple Coneflower in your garden not only attracts pollinators but also provides dyeing material for your projects.
Exploring the World of Natural Dyes: Creating, Using, and Inspiring Ideas
The art of natural dyeing is a captivating journey that allows us to tap into the vibrant hues found in nature while embracing sustainability and creativity. Unlike synthetic dyes, natural dyes are derived from plant materials, offering a wide range of colors and a unique, eco-friendly approach to dyeing. In this blog post, we will delve into the fascinating world of natural dyes, exploring how to create them, what materials to dye, and creative ideas for utilizing the dyed creations. Get ready to embark on a colorful adventure!
Creating Natural Dyes
- Gathering Plant Materials: To create natural dyes, start by gathering plant materials that possess dyeing properties. Consider using flowers, leaves, barks, roots, or even kitchen scraps. Some popular dye plants include marigold, onion skins, turmeric, avocado pits, and madder root.
- Preparing the Dye Bath: Once you have collected the plant materials, prepare a dye bath by simmering them in water. The amount of plant material and water ratio will depend on the specific dye plant and desired intensity of color. Experimentation is encouraged to achieve different shades.
- Extracting the Dye: Simmer the plant materials in water for an extended period, typically 30 minutes to an hour. This allows the dye molecules to infuse into the liquid. Afterward, strain the liquid to remove the plant materials, leaving behind the natural dye.
- Modifying Colors: For additional color variations, you can experiment with altering the pH level of the dye bath. For example, adding vinegar or lemon juice can shift colors toward the acidic side, while baking soda can make them more alkaline.
Dyeing Ideas and Techniques
- Fabric Dyeing: Natural dyes can be used to color various fabrics, such as cotton, linen, silk, and wool. Before dyeing, soak the fabric in a mordant solution (e.g., alum, iron, or soy milk) to help the color adhere better. Dip the fabric into the dye bath and simmer until the desired color is achieved. Experiment with different dyeing techniques like tie-dye, dip-dye, or resist techniques to create unique patterns.
Using Soy Milk as Mordant:
Using soy milk as a mordant is an interesting and eco-friendly alternative to traditional metal-based mordants. Soy milk contains natural proteins, such as soybean proteins, which can act as a binding agent between the dye and the fabric, effectively fixing the color. This method is particularly suitable for plant-based dyes and natural fibers like cotton or silk.To use soy milk as a mordant, start by preparing a soy milk bath. You can either use store-bought soy milk or make your own by soaking and blending soybeans and then straining the mixture to obtain a smooth liquid. Heat the soy milk in a pot, but avoid boiling it to prevent curdling. Once warm, submerge your clean, pre-washed fabric into the soy milk bath and let it soak for at least an hour. During this time, the proteins in the soy milk will bind to the fabric, creating a receptive surface for the dye.
After soaking, remove the fabric from the soy milk bath and gently squeeze out any excess liquid. You can then proceed to dye the fabric using your desired plant-based dye. The soy milk mordant helps the dye molecules adhere to the fabric, resulting in improved color absorption and longevity. Follow the dyeing instructions for your specific dye and fabric combination, making sure to rinse and wash the fabric thoroughly after dyeing to remove any excess dye and soy milk residue.
One of the advantages of using soy milk as a mordant is its natural and non-toxic nature, making it safe for both the environment and personal use. Additionally, it can create a soft and subtle color palette, allowing for delicate and nuanced dyeing effects. However, it is important to note that soy milk may not be as effective as metal-based mordants in achieving strong and vibrant colors, especially with certain types of dyes or fabrics. Therefore, it is recommended to conduct small-scale tests and experiment with different dye concentrations and techniques to achieve the desired results.
By utilizing soy milk as a mordant, you can explore a more sustainable approach to dyeing while adding a unique touch to your textiles, bringing out the natural beauty of plant-based dyes on your fabrics.
Making Iron Mordant:
To create mordant, you will need a container, preferably non-reactive, such as a glass jar. Begin by collecting a handful of clean iron nails, ensuring that they are free from any rust or coating. Place the nails into the container and pour enough vinegar to completely submerge them. You can use white distilled vinegar or any other vinegar with a high acetic acid content.Seal the container and let it sit undisturbed for at least a week, allowing the vinegar to react with the nails and dissolve the iron ions. During this time, the vinegar will gradually change color, becoming darker as it absorbs the iron. Occasionally, you may want to gently shake the container to encourage the reaction.
Once the mordant has matured, strain the liquid to remove any remaining nail particles or sediment. The resulting solution is now ready to be used as a mordant. It can be applied to natural fibers, such as cotton, linen, or wool, prior to dyeing or printing processes. The mordant helps the dyes adhere to the fibers more effectively, resulting in improved colorfastness and longevity.
- Yarn and Fiber Dyeing: Natural dyes can transform plain yarn and fibers into beautifully colored materials for knitting, crocheting, or weaving projects. Use the same dyeing techniques as with fabrics, ensuring that the yarn or fibers are thoroughly saturated with the dye bath.
- Paper and Stationery: Create personalized stationery or decorative papers using natural dyes. Dip paper into the dye bath or apply the dye with brushes or sprays to achieve various effects. These dyed papers can be used for art projects, scrapbooking, or creating unique greeting cards.
- Natural Easter Eggs: Instead of using artificial dyes, try dyeing eggs naturally for Easter. Wrap eggs with onion skins, simmer them in dye baths made from plants like beets, spinach, or blueberries, and watch as they transform into beautifully colored creations.
- Floral Arrangements: Extend the lifespan of cut flowers while adding a touch of color to your home by dyeing the water. Add natural dyes to the vase water to create vibrant or subtle hues, turning ordinary flower arrangements into extraordinary displays.
- Food and Culinary Creations: Enhance your culinary adventures by incorporating natural dyes into your recipes. Use plant-based dyes to color frostings, dough and icings, create natural food coloring for baked goods, or infuse beverages with natural hues. Beet juice, turmeric, and spirulina are just a few examples of natural dyes that can be used in the kitchen.
Creative Uses for Dyed Creations
- Textile Crafts: Use the dyed fabrics, yarns, and fibers to create a wide range of textile crafts. Knit or crochet colorful scarves, hats, or blankets. Weave vibrant tapestries or create macramé wall hangings. The possibilities are endless!
- Fashion and Accessories: Incorporate the dyed fabrics into your wardrobe by sewing unique garments or embellishing existing pieces. Create one-of-a-kind scarves, napkins, skirts, or shirts. You can also make vibrant accessories like headbands, bags, or jewelry using the dyed yarns or fibers.
- Home Décor: Add pops of color to your living space with dyed textiles. Make decorative pillows, napkins, tea towels, or table runners using the dyed fabrics. Display hand-dyed yarn as wall art or create colorful tassels and pom-poms for accent pieces.
- Nature-inspired Art: Use the dyed papers to create nature-inspired art pieces. Incorporate the colors into collages, greeting cards, or mixed media projects. Combine dyed fibers with natural materials like sticks or leaves to create unique sculptures or wall hangings.
- Sustainable Gift Wrapping: Wrap gifts in eco-friendly style by using dyed fabrics, yarns, or papers as gift wraps. Add natural twine, dried flowers, or leaves as embellishments for a personalized touch.
- Sensory Play: Dyed rice or pasta can be used for sensory play activities for young children. Fill sensory bins with vibrant dyed materials and let children explore different textures, colors, and patterns.
Conclusion
Creating and using natural dyes opens up a world of possibilities for artistic expression, sustainable practices, and connection with nature. Whether dyeing fabrics, yarns, papers, or food, the process of natural dyeing offers a sense of fulfillment and an opportunity to engage in mindful creativity. So, unleash your imagination, gather plant materials, and embark on a journey of natural dyeing. Let the colors of nature inspire you to create unique and beautiful creations that reflect your eco-consciousness and artistic spirit. Enjoy the process, experiment with different plant materials, and embrace the beauty of natural colors in your crafting and everyday life.
back to KidZone Science